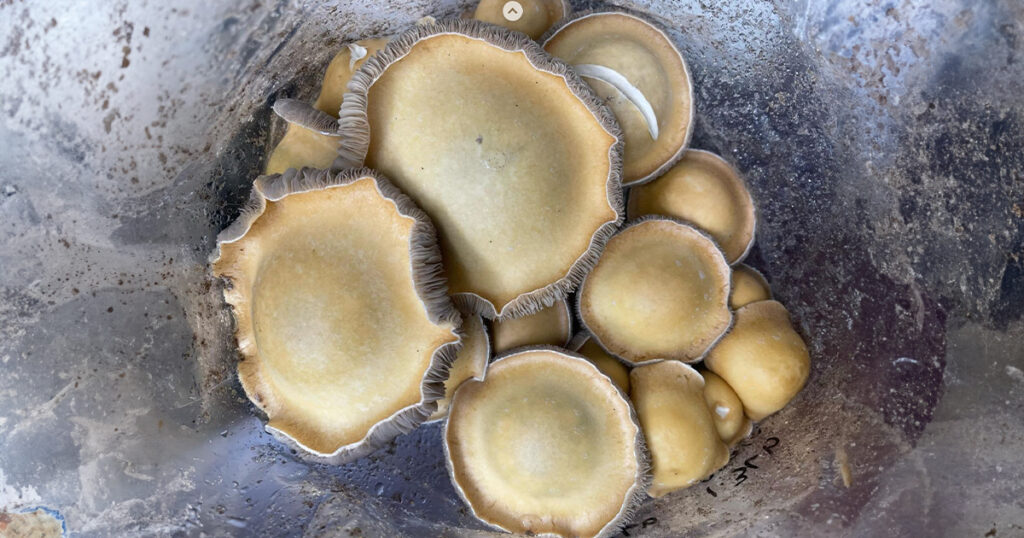
Companies like Dreamer Shrooms offer fully colonized mushroom kits for research purposes. These kits contain living mycelium and can be used to grow amazing mushrooms, even though this isn’t their intended purpose. Here’s a quick guide on how to use these mushroom kits to grow your own mushrooms.
This is the fastest and surest way to grow your own mushrooms. Growing this way is quicker, easier, and more reliable than other methods. It also has some distinct differences from growing in mono-tubs, outdoors, or other types of kits that are not fully colonized.
First, if the contents of the bag look broken up or cracked when you receive it, tap it against the table and press down on the substrate to form a nice flat surface. Then just set the bag aside. The mycelium will reconnect the block. When the mycelium colonizes a substrate, it forms a network of cells that can communicate and share resources. This network being intact is essential for fruiting, but don’t worry—the mycelium is resilient and will repair gaps and breaks when damaged.
If the mycelium block shows any off colors like green, orange, yellow, or pink, it could be a sign of contamination. Contact your supplier immediately to notify them, and they should offer a full refund or replacement. Contamination in fully colonized mushroom kits is rare but can happen. Suppliers like Dreamer Shrooms offer a 100% satisfaction guarantee, allowing you to get a full refund or replacement if you’re unhappy with the product for any reason.
After you’ve inspected your bag or recompressed it due to any breaks or cracks, just follow these simple steps:
- Place the bag in a convenient area. The kits need some light—indirect natural light or artificial light is ideal—but avoid direct sunlight, which can harm the mushrooms. The ideal temperature range is 65°F-75°F; anything too cold or too hot can hinder progress. Do not open the bag; it provides everything the mycelium needs to thrive. These mushrooms are optimized for a closed bag environment, so opening it prematurely can cause delays.
- Expect to see results starting within 14 days of receiving your bag, but sometimes it can take a little longer depending on the variety and growth conditions.
- Keep an eye out for pins (baby mushrooms). Once you spot them, your mushrooms are just days away from maturing.
- As the mushrooms grow, watch the veil (the thin layer of flesh connecting the cap and stem in young mushrooms). The veil indicates the best time to pick the mushrooms. Soon after the veil breaks, it will release spores into the bag, signaling the end of the first flush. Spores are harmless but may affect the aesthetics of the mushrooms. Harvest when the underside of the cap starts to stretch, but before it fully opens into an umbonate (flattened) shape. Once this happens, the spores drop in just a few hours.
- When the veil indicates it’s time for harvesting, cut the bag open just below the seal and pick the mushrooms with a gloved hand. Gently twist the stalk to remove it. If any substrate comes loose with the mushrooms, remove it from the bag. Once the bag is opened, pieces of substrate and mycelium that are no longer connected to the mycelial network can be a vector for contamination.
- After harvesting the first flush, give the bag a quick squeeze to push out any accumulated air, then allow it to refill with fresh air. Close the bag by folding the top over a few times and securing it with clips or tape. Then wait for the next flush.
- Typically, there will be 1-2 more flushes, each usually smaller than the previous one. Some grow kits, like those from Dreamer Shrooms, are formulated so that adding moisture during growth and between flushes isn’t usually necessary. However, it’s good to evaluate the moisture level after each harvest. If condensation is absent, you can soak the block by adding cold water to the bag and placing a small weight on top to submerge it. Adding a few teaspoons of 3% hydrogen peroxide to the water can help fend off contaminants. Soak for 1-2 hours, drain the excess water, then close the bag again. The next flush should begin in 5-21 days.
- Most times, the first flush is the largest, but occasionally it’s the second flush. It depends on the unique mycelium culture.
- HOT TIP: If your harvest is exceptionally large or you notice the block inside the bag is getting a little dry (usually after the 2nd flush), soak it in tap water with a few teaspoons of 3% hydrogen peroxide. This can increase yields and help prevent contamination that may occur with later flushes.
- It’s okay to keep flushing, although most growers compost their blocks after 2-3 flushes. We’ve seen customers get 4-5 flushes from one bag. Keep resetting your bag after each harvest to see if it continues to produce more flushes beyond the 2nd or 3rd.
And that’s all there is to it. Mycology has never been easier, and with fully colonized kits from Dreamer Shrooms, you’ll be on your way to the exciting world of mushrooms in no time at all.
Happy Growing!


